The Elite Tattoo Planning Guide
How to plan a black and grey realism tattoo, or a full sleeve, that suits your body, holds its detail and still feels right years from now.
- Turn a meaningful idea into a clear design direction
- Choose the right size so the detail lasts
- Pick placement that works with the shape of your body
- Gather references your artist can actually use
- Know what to look for in a realism artist
- Prepare for your session and protect the tattoo as it heals
- Plan a full sleeve as one piece that flows round the arm
- See how a sleeve is built day by day and paced round your life

Check your inbox
Your guide is on its way to .
If you can't see it in a few minutes, check your spam or promotions folder.
While you wait, write your idea down in one sentence. That's the first step in the guide.
Twenty steps in two parts, from your first idea to a finished sleeve
Start with the meaning
Why the reason behind your idea decides the details of the design.
One main subject
The three layers that stop a design turning into noise.
Size it for the detail
How big realism needs to be to still read clearly years later.
Placement for your body
Matching the shape of the design to the shape of you.
References that help
The photos that work, the ones that don't and why.
Understand black and grey
How contrast works and why it decides how your tattoo ages.
Choose the right artist
What to look for and the questions worth asking.
Time and budget
An honest look at what a large realism piece takes.
Prepare for your session
What to do in the week before and on the day.
Heal it and protect it
The habits that keep your darks dark for life.
One piece, not a collection
Why the whole arm is planned before the first line.
How a sleeve wraps
Planning every side of the arm, not just one view.
The arm laid out flat
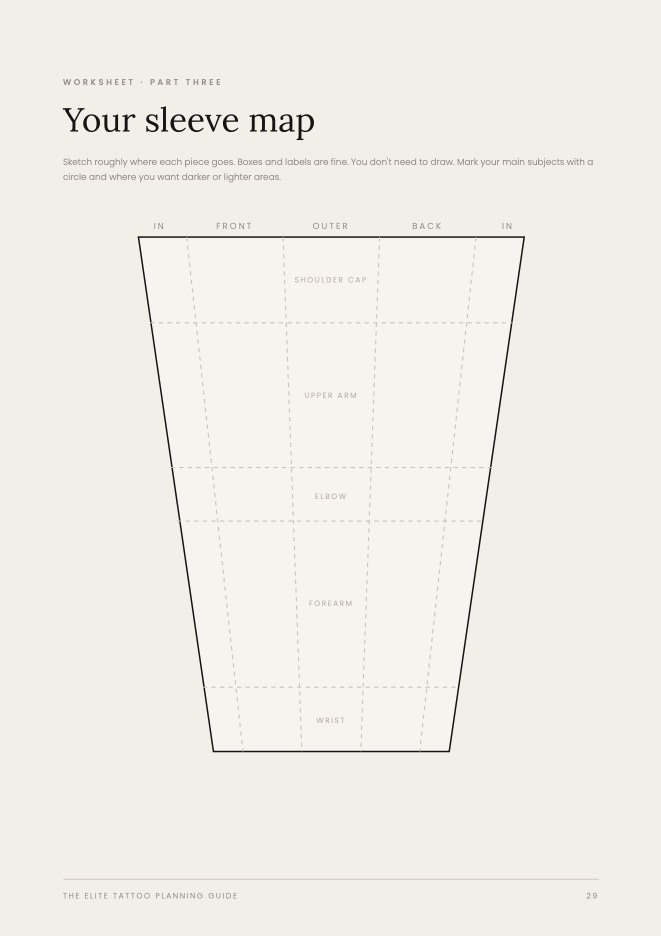
The map I use to place each subject.
Flow
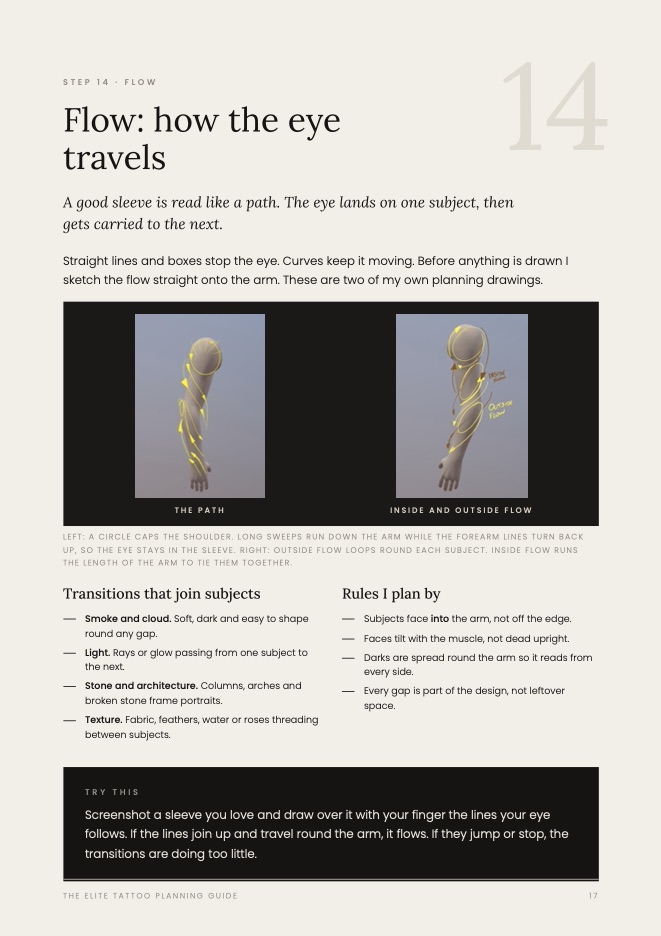
How the eye travels, shown with my own drawings over healed work.
The arm moves
Planning for the way skin twists, bends and flexes.
One light, one story
Why one light source makes the whole sleeve feel like one world.
Where it starts and stops
How the shoulder and the wrist finish.
The process
How a sleeve project runs, from first message to healed.
Building it day by day
The order a sleeve is tattooed in and why.
Pace and sitting
Fitting the days round your life and getting through a full day.
Plus the twelve planning mistakes I see most often and a three page worksheet with your own sleeve map.
I've been tattooing for twenty years. I work from a private studio in East Kilbride with clients from Glasgow and across Scotland. I focus on large scale black and grey realism.
Most people I meet don't need more ideas. They need clarity. This guide is the planning I walk every client through, written down so you can start before we ever speak.
Plan it properly from the start
If the idea matters to you, give it the thought it deserves. The guide shows you where to begin.
Get the free guide